Managing security groups
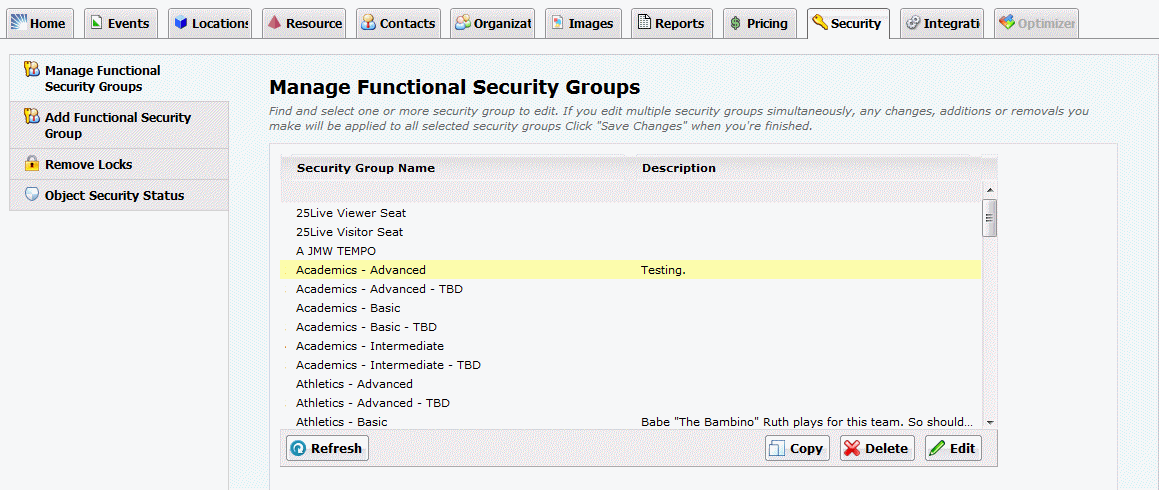
Manage Functional Security task tab
Use the Manage Functional Security Groups task tab to:
• Edit one or more security groups
• Copy security groups as the basis for creating new security groups
• Delete security groups
Editing one or more security groups
Note: You can’t edit the functional security rights of the System Administrators (-1) security group, but you can change the group members.
1. Highlight the security group(s) you want to edit, and click Edit. To highlight multiple security groups, hold down the Shift key and click each security group.
| If you choose to edit multiple security groups, be aware that all and only the changes you make will be applied to all the security groups you select for edit. When in doubt, edit security groups one at a time. |
2. If you highlighted one security group:
• Edit the security group name and/or description as needed.
• Edit the functional security rights of the group as needed by clicking the Rights “EDIT” link, expanding each of the rights areas you want to edit, and modifying the rights in each area as needed. See
“Appendix A - Functional Security Settings” for descriptions of each functional security right.
Note: “Revert to Saved” reloads the last saved copy of the security group’s functional security settings.
• Edit the security group members as needed by clicking the Members “EDIT” link and following these instructions:
To... | Do this... |
Move a member to another security group | Choose the group from the Change Group drop-down list. |
Add new members | 1 Click Add a New Member. 2 Find a user you want to add by full or partial name. 3 If multiple users are returned, choose the user you want from the drop-down list. 4 Repeat steps 1 - 3 to add more members to the group. |
If you highlighted more than one security group:
• Edit the description of all selected groups as needed by checking the Description box, then entering or modifying the description as needed.
• Edit the functional security rights of all selected groups as needed by checking the Rights box, expanding each of the rights areas you want to edit, and modifying the rights in each area as needed. See
“Appendix A - Functional Security Settings” for descriptions of each functional security right.
3 Click Save Changes.
Copying a security group
Copying a security group copies its functional security, object security, and assignment policy rights.
1. Highlight the security group you want to copy, and click Copy.
2. Enter a name for the new security group, and enter or edit the description as needed.
4. Add members to the group.
• Click Add a New Member.
• Find a user you want to add by full or partial name.
• If multiple users are returned, choose the user you want from the drop-down list.
• Repeat these steps to add additional members to the group.
5. Click Add Security Group.
Deleting a security group
1. Click the Security tab, then click “Manage Security Groups.”
2. Highlight the security group you want to delete, and click Delete. You can only delete one security group at a time.
3. Click Delete Security Group to confirm.
4. Click Manage More Security Groups to return to the Manage Security Groups page.

