Managing contacts
| Required functional security Functional security required to create, edit, and delete contacts (including 25Live users): • Contacts: Contact Access = Can view, edit, and create • Contacts: Contact Delete = Can delete • Contacts: Security Groups = Can view user lists, change security group permissions, assign members to groups, make users active or inactive, create and delete security groups, and enable/disable object security |
Note: 25Live users with functional security Contact Access = “Can view, edit, and create” can also create contacts who are not 25Live users in the 25Live Pro Event Form.
Manage Contacts task tab
Use the Manage Contacts task tab to:
• Add contacts
• Copy contacts as the basis for creating new contacts
• Edit contacts one by one or multiple contacts simultaneously
• Delete contacts one by one or multiple contacts simultaneously
Guidelines for adding contacts
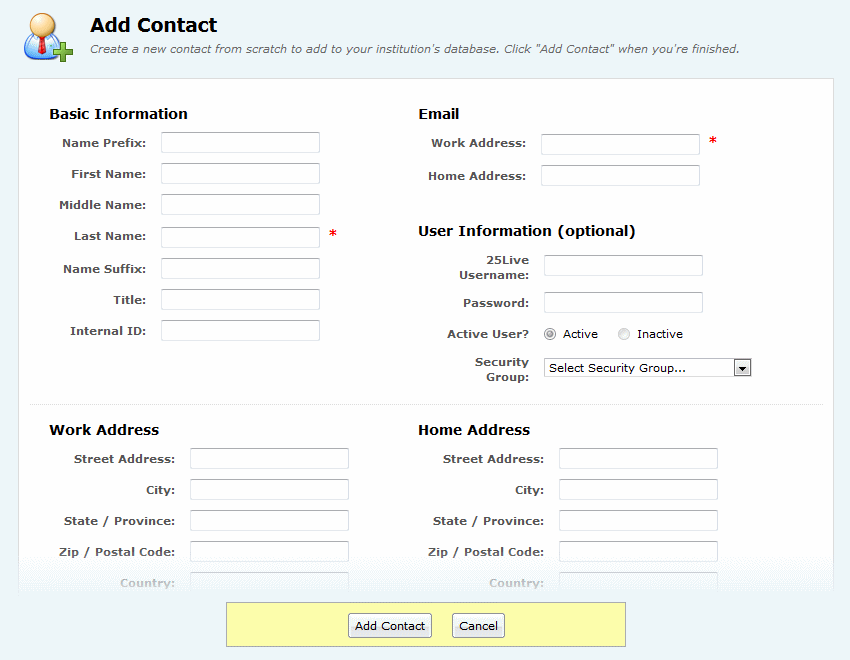
• Only Last Name and Work Email Address are required to add a contact.
• If the contact you’re adding is a 25Live user, you also have to add their 25Live username and password and select their security group.
• Associate one or more organizations with the contact as needed.
• When selecting attributes of the contact, specify the value of each.
Adding contacts
1. With the Manage Contacts task tab selected, click the ADD icon to go to the Add Contact page.
Note: You must scroll down to see all the contact information you can specify.
2. Enter basic identifying information about the contact (last name is required) and the contact’s work email address (required) and, optionally, their home email address.
3. If the contact is a 25Live user:
• Enter his/her 25Live username and password. Passwords can only contain letters, numbers, and underscores.
• Indicate whether the user is active (default) or inactive.
• Select the user’s 25Live security group.
4. Enter work and home address and phone information as needed, and enter any comments.
5. Associate one or more organizations with the contact as needed:
• Click New Organization.
• Select the contact’s role in the organization, if any.
• Find and select the organization.
• If the contact is associated with other organizations, repeat these steps.
6. Check the custom attributes that pertain to the contact and enter or select the appropriate value for each.
7. Click Add Contact.
Copying a contact
1. With the Manage Contacts task tab selected, click the COPY icon to go to the Add Contact via Copy page.
2. Find the contact you want to copy by simple name search or alphabetical index, highlight the contact, then click Copy.
3. Edit the information for the new contact as needed. Click the “EDIT” link to expand sections that are closed.
4. Click Add Contact.
Editing contacts
1. With the Manage Contacts task tab selected, click the EDIT icon to go to the Edit Contacts page.
2. Find the contact(s) you want to edit by simple name search or alphabetical index.
3. To edit selected contacts in the displayed list, highlight the contact(s) and click Edit Selected.
To edit all the contacts in the displayed list, click Edit All.
| If you choose to edit multiple contacts, be aware that all and only the changes you make will be applied to all the contacts you select for edit. When in doubt, edit contacts one at a time. |
4. If you selected one contact, edit his/her information as needed. Click the “EDIT” link to expand sections that are closed.
If you selected multiple contacts, check the box of each data section you want to edit, and change the information as needed.
| • Editing the work email address of a 25Live user contact may break the connection between the user and your Active Directory. If you’re unsure, check with your 25Live System Administrator. • Modifying the viewer25 user contact can have unintended consequences. Contact CollegeNET Technical Support before proceeding. |
5. Click Save Changes.
Deleting contacts
| Consider carefully before deleting contacts, because when you do the contacts are completely removed from your Series25 database, including all past actions taken on the contacts (event role designation, information edits, and so on), who performed them, and when. All information about the contacts, both past and present, no longer exists. |
1. With the Manage Contacts task tab selected, click the DELETE icon to go to the Delete Contact page.
2. Find the contact you want to delete by simple name search or alphabetical index.
3. To delete selected contacts in the displayed list, highlight the contact(s) and click Delete.
To delete all the contacts in the displayed list, click Delete All.
4. Click Delete Contact to confirm.
5. To delete other contacts, click Delete Another Contact. To return to the Manage Contacts page, click Start Over.


