Defining and assigning account codes
To define credit and debit account code formatting
1. In the 25Live Administration Utility, select the Pricing tab, then select the Rate Schedule Account Formats task tab.
2. Define the Credit Account Format and Debit Account Format using any or all of these elements and any separators you choose:
• OrganizationCode
• GroupCode
• AccountNumber
Example:
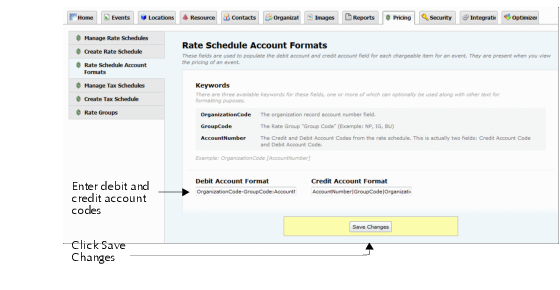
3. Click Save Changes.
Note: If defined as shown above, the account numbers for the Boy Scouts example we’ve used to describe how to define account numbers (
Account numbers) would appear like this on invoices:
• Debit: 444_7701:NP
• Credit: 7702/NP
To assign an accounting code to an organization
1. In the 25Live Administration Utility, select the Organizations tab, then select the Manage Organizations task tab.
2. Click EDIT.
3. Find the Organization you want to edit. There are many ways to do this:
• Select Named Search, then enter all or part of an organization’s name or title and click Search.
• Select Index, then click an alphabetic group.
• Select Types, then click a pre-defined organization type.
• Select Categories, then click a pre-defined category.
• Select Saved Searches, then click a pre-defined search.
4. Select an organization from the list and click Edit.
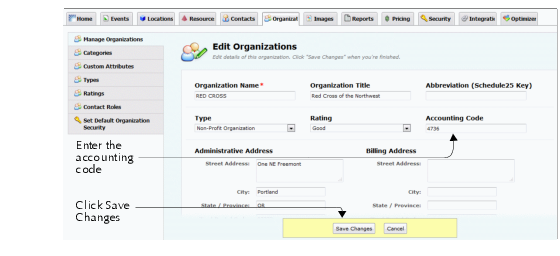
5. Enter the code in the Accounting Code field.
6. Click Save Changes.
7. A message is displayed confirming successful editing of the organization. Either:
• Click Edit More Organizations to return to your search results, and repeat steps 4–6 for each organization.
OR
• Click Start Over to search for other organizations to edit, and repeat steps 2–6 for each organization.
To assign a credit code and debit code to a rate schedule
1. In the 25Live Administration Utility, select the Pricing tab, then select the Manage Rate Schedules task tab.
2. Click the rate schedule type of the rate schedule.
3. Double click the rate schedule to edit.
4. Enter the credit account code in the Credit Account Code field.
5. Enter the debit account code in the Debit Account Code field.
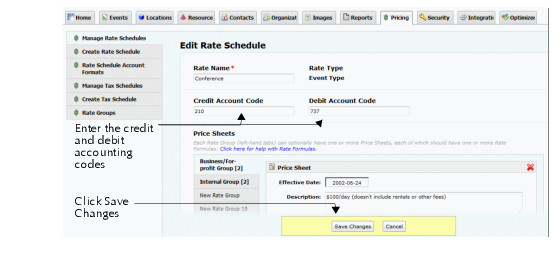
6. Click Save Changes. A message is displayed confirming successful editing of the rate schedule.
7. Click Manage More Rate Schedules as needed.