Creating rate groups
1. In the 25Live Administration Utility, select the Pricing tab, then select the Rate Groups task tab.
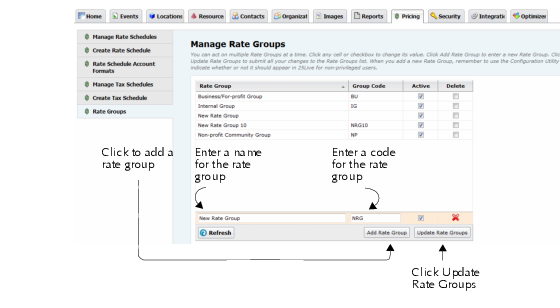
2. Click Add Rate Group.
3. Enter a name for the rate group.
4. Enter a group code for the rate group. This code can optionally be a part of credit or debit account identifiers displayed with pricing, on invoices, and so on. See
Defining and assigning account codes.
5. New rate groups are active by default. Optionally, un-check the box in the Active column to indicate the rate group is not active.
6. Repeat steps 2–5 to create more rate groups.
7. Click Update Rate Groups.
Note: To remove a rate group click its red X icon.