Creating the Event Type Hierarchy
| Required functional security Functional security required to create and manage the Event Type Hierarchy: Cabinets and Folders: Event Type Hierarchy = Can view, edit, deactivate, create and delete |
Process
You create your Event Type Hierarchy by entering the first cabinet type, then entering the folder types in that cabinet type, and finally entering each event type in the folder type or cabinet type and each of their associated reports and data properties. You repeat this entire process for each cabinet type/folder type/event type portion of the Hierarchy.
Note: Type names must be unique.
Creating your Event Type Hierarchy
1. Select the Event Type Hierarchy task tab, and click “Browse (manage/add).”
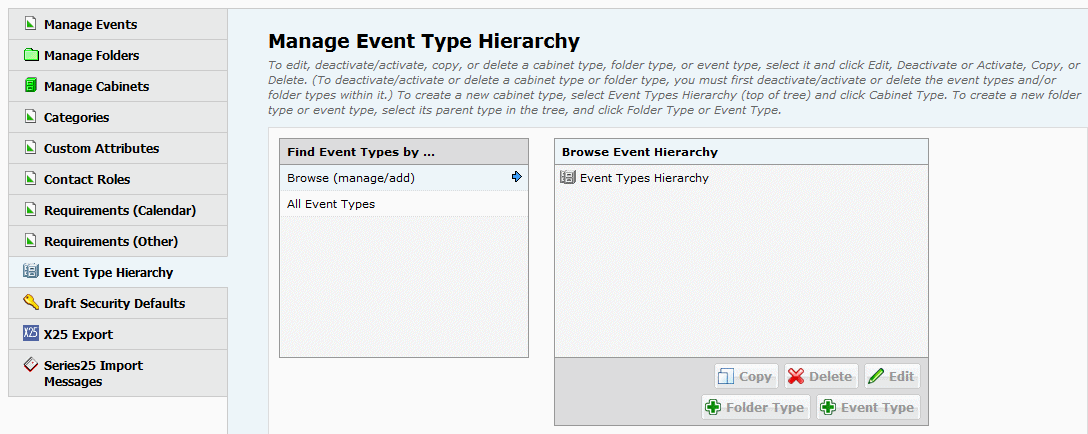
2. Create a cabinet type:
• Click

, then click Cabinet Type to go to the Edit Cabinet Type page.
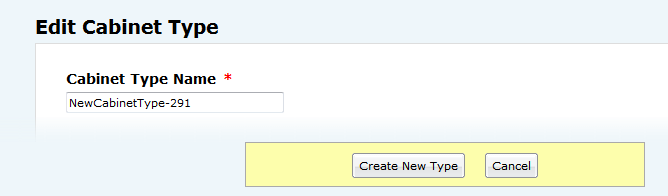
• Enter a name for the cabinet type.
• Click Create New Type.
3. Create the folder types within this cabinet type:
• Click Folder Type to go to the Edit Folder Type page.
• Enter a name for the folder type.
• Click Create New Type.
• If you want to create additional folder types within the cabinet type, select the cabinet type and repeat step 3.
| Don’t create folder types within folder types |
Note: You also have the option of copying existing folder types as the basis for creating new folder types—with the folder type selected, click Copy to begin, then follow steps 4 - 6 of
“Copying types”.
4. Create the event types within each folder type.
• With the folder type selected, click Event Type to go to the Edit Event Type page.

• Enter a name for the event type.
• If you want to associate reports with this event type, click the “Edit” link below Reports, select the Confirmation Notice and/or Invoice report you want as the default for this event type, then check any additional reports you want to associate with the event type, or check the “Check All” box to select all reports. See
“Associating reports and data properties with event types” • If you want to associate categories, contact roles, custom attributes, requirements (publish to calendar), and/or requirements (other) with this event type, click the “Edit” link below each data type and select the data items you want to associate with the event type. See
“Associating reports and data properties with event types” 5. Click Create New Type.
Note: You also have the option of copying existing event types as the basis for creating new event types—with the event type selected, click Copy to begin, then follow steps 4 - 6 of
“Copying types”.
6. Repeat steps 4 and 5 for other event types.
7. Repeat steps 2 - 6 to add additional cabinet types, folder types, and event types.
Once you’ve completed your Event Type Hierarchy, you’re ready to create your event structure made up of cabinets and folders. For information on performing this task see
“Cabinets and folders”.

