Creating rate schedules
To begin creating a rate schedule
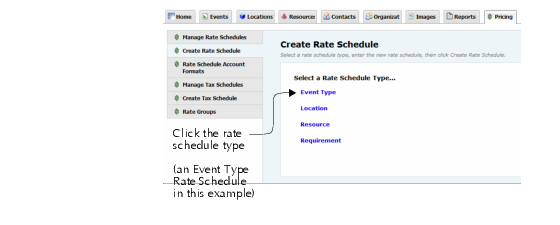
1. In the 25Live Administration Utility, select the Pricing tab, then select the Create Rate Schedule task tab.
2. Select a rate schedule type from the list provided.
Select:
• Event Type if the rate schedule should be applied based on the event type of an event.
• Location if the rate schedule should be applied based on the locations assigned to an event.
• Resource if the rate schedule should be applied based on the resources assigned to an event.
• Requirement if the rate schedule should be applied based on the requirements of an event.
To complete the rate schedule and add price sheets
3. Enter a name for the rate schedule in the Rate Name field.
4. Enter the credit account code in the Credit Account Code field.
5. Enter the debit account code in the Debit Account Code field.
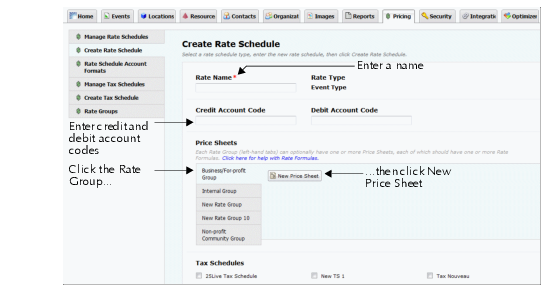
6. In the Price Sheets section, click the rate group for which you want to create a price sheet, then click New Price Sheet.
7. In the Effective Date field, enter or use the calendar control to select the first date the price is effective. You can create different prices for different effective dates (for example, if a price changes from semester to semester).
8. Enter a brief description of the price sheet in the Description field.
To add rate formulas
9. Click New Rate Formula to open the Rate Formula field
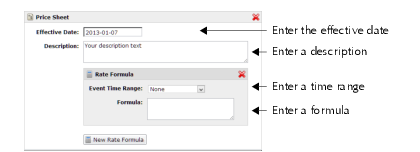
10. Select the appropriate time breakpoint option from the Event Time Range drop-down list:
• None if you are not using time breakpoints in your formula.
• Specific Duration if you are using time duration as breakpoints in your formula (for example, the first four hours are charged at one rate, the next four hours at another rate, and so on).
• Specific Times if you are using time-of-day as breakpoints in your formula (for example, charge one rate from 10:00 a.m. to 6:00 p.m., and another from 6:00 p.m. to midnight).
11. If your formula breakpoints are based on duration, enter the minimum and maximum duration in days, hours, and minutes.
For example, if the first four hours use of a location costs $20 per hour, set Min to 0d
00h 00m and Max to 0d
04h 00m.

If your formula breakpoints are based on time-of-day, enter or select the start and end times in hours and minutes.
For example, if a location costs $50 an hour between 12 noon and 5:30 p.m., enter or select “12:00 pm” in the Start Time field and enter or select “5:30 pm” in the End Time field.
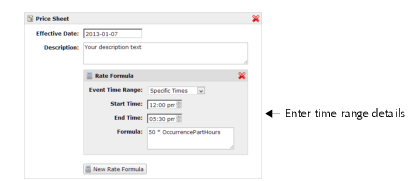
In the Formula field, enter the formula for this price sheet.
| See “Pricing Formula Examples and Variables” for formula examples and descriptions of all formula variables. This file is also available from the Price Sheet link “Click here for help with Rate Formulas.” Remember that the formula you create will apply to each occurrence of an event. |
12. Repeat steps 9–12 to create additional rate formulas for this price sheet.
13. Repeat steps 6–12 to create additional price sheets for this rate schedule.
Note: To remove price sheets or rate formulas, click the red X icon.
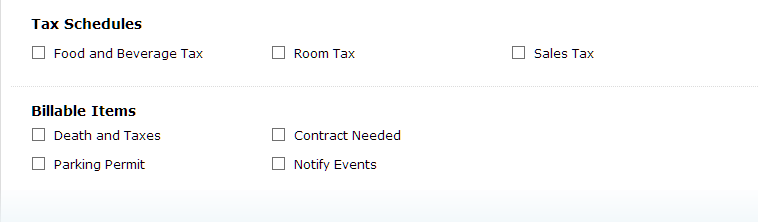
14. Check the boxes of the applicable tax schedules for this rate schedule.
To select billable items
15. Select the applicable billable items for this rate schedule.
If you’re selecting billable items for an Event Type or Requirement rate schedule, check the boxes of the billable items associated with the rate schedule.
If you’re selecting billable items for a Location or Resource rate schedule, a search list and a selected list are presented:
• Click the indices, categories or saved searches in the left panel to display a list of billable items. You may need to “drill-down” (click interim results) to return a list of billable items. In the example below, the items are selected by category.
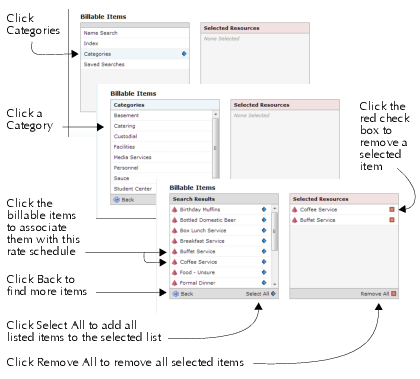
• Click a billable item in the search list to move it to the selected list on the right, or click Select All to move all of the billable items in the current search list to the selected list.
• Click Back at the bottom of the search list to locate other billable items to add to the selected list.
Note: Click the red check box to the right of an item name to remove it from the selected list. Click Remove All at the bottom of the selected list to remove all items from the selected list.
16. Repeat step 15 as needed to select all of the billable items you want to associate with the rate schedule.
17. Click Create Rate Schedule. A message is displayed confirming successful creation of your new rate schedule.
18. Click Create Another Rate Schedule as needed.